DIY: Overhaul A Kayak, Part 3:Add A YakAttack Mighty Mount Switch
I only recommend products I believe in and use myself. If you purchase something using a link to an item on a post, I may earn a small commission at no additional cost to you. Read More
Warning: Modifying a kayak by drilling or removing hardware can impact its structural integrity and buoyancy. This post is to give insight into how I rig my gear, but be sure to consult an expert or the manufacturer prior to attempting on your own.
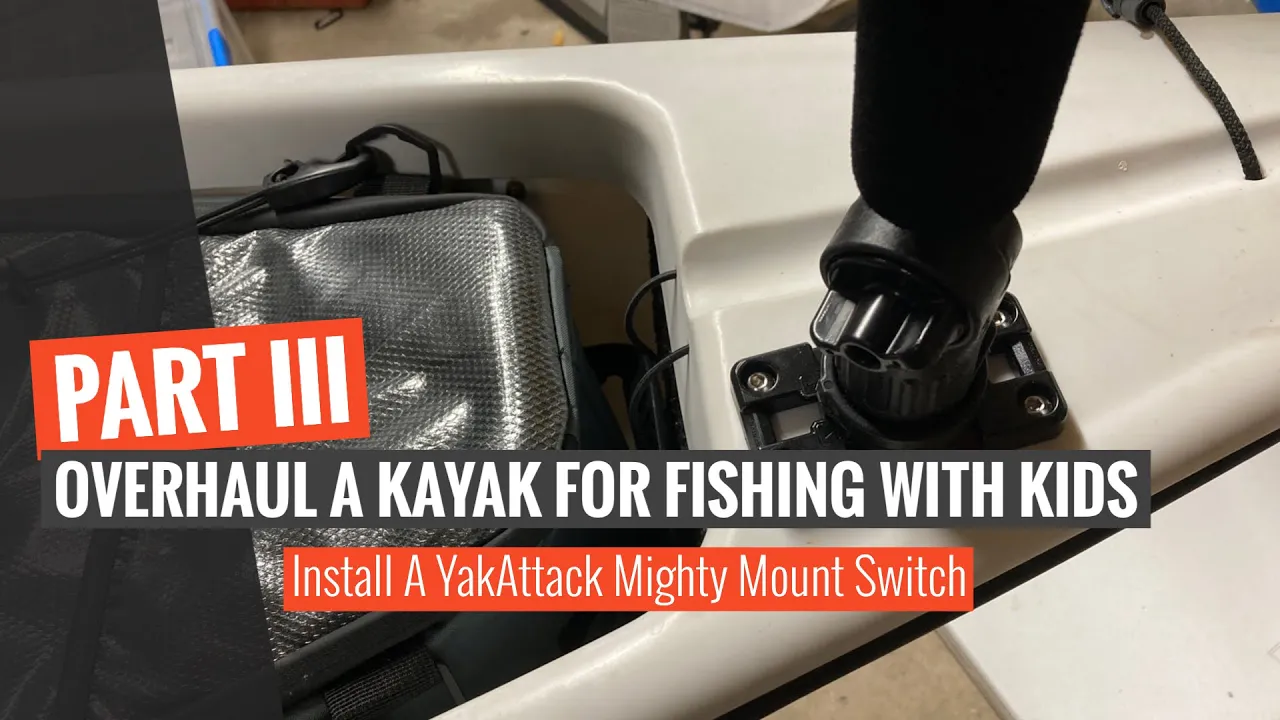
If you are following along with the series, I’m documenting the process of converting a Native Ultimate into a fishing kayak for myself and my kids. Part three of this overhaul focuses on replacing a bulky Scotty 241 base with a lower-profile YakAttack Mighty Mount Switch. The Switch is less of a nuisance on the deck and provides a solid foundation for mounting cameras or a flag when I’m out in open water.
Related Posts

DIY: Overhaul A Kayak, Part 1: Repairing Oyster Rash and Removing Rust

DIY: Overhaul A Kayak, Part 2: Replace and Upgrade Flush Mount Rod Holders

DIY: Overhaul A Kayak, Part 3:Add A YakAttack Mighty Mount Switch

DIY: Overhaul A Kayak, Part 4: Replace the Shock Cord to Bring the Elasticity Back

DIY: Overhaul A Kayak, Part 5: Adding A Track System
Step 1: Remove Existing Hardware
The first step is to back out the screws from the existing mount. On this particular kayak, the original hardware was installed with shallow wall anchors rather than a backing nut. Removing these will likely leave a fairly large hole in the deck, which means a standard installation won't be enough—you’re going to need a backing plate to ensure the new mount is secure. [00:34]
Step 2: Create a Backing Plate
Using a standard plastic cutting board, draw a template that matches the footprint of your new mount. A single cutting board is cheap and can provide enough material for several backing plates. Cut the template out to create a rigid plate that will sit on the underside of the kayak deck to sandwich the plastic and provide extra strength. [01:05]
Step 3: Drill the Mounting Holes
The screw size for the Mighty Mount Switch is a quarter inch. Match your backing plate up to the switch and drill your first 1/4″ hole. I like to put the first screw in immediately after drilling to keep the plate from shifting while I drill the remaining holes. This ensures your hole pattern matches up perfectly. [01:28]
Step 4: Install the Mount
Position the Mighty Mount Switch over the existing holes on the kayak deck. Reach inside the hull to position your new backing plate underneath. Feed your stainless steel hardware through the mount, the deck, and the backing plate. Use an allen wrench to snug everything down. Even with the large holes left by the old anchors, the backing plate will pull everything tight and create a rock-solid mount. [01:50]
Step 5: Add Attachments
The Mighty Mount Switch is compatible with the YakAttack LockNLoad system. This base is incredibly versatile; once it's on, you can attach your accessories and adjust them by simply pushing a button to shift the angle. It’s perfect for changing camera angles on the fly without having to remove the entire attachment from the base. [02:07]
Wrapping Up
It’s a simple upgrade, but it’s one of those things you’ll appreciate every single time you’re out on the water. It's especially nice to have the option of not drilling new holes while still upgrading to a modern, low-profile mount. Give it a shot and see if it doesn't make your setup a little more efficient.
Materials Needed
(May Contain Links that Earn Commission)
•
Plastic cutting board (for backing plate)•
1/4″ stainless steel hardware