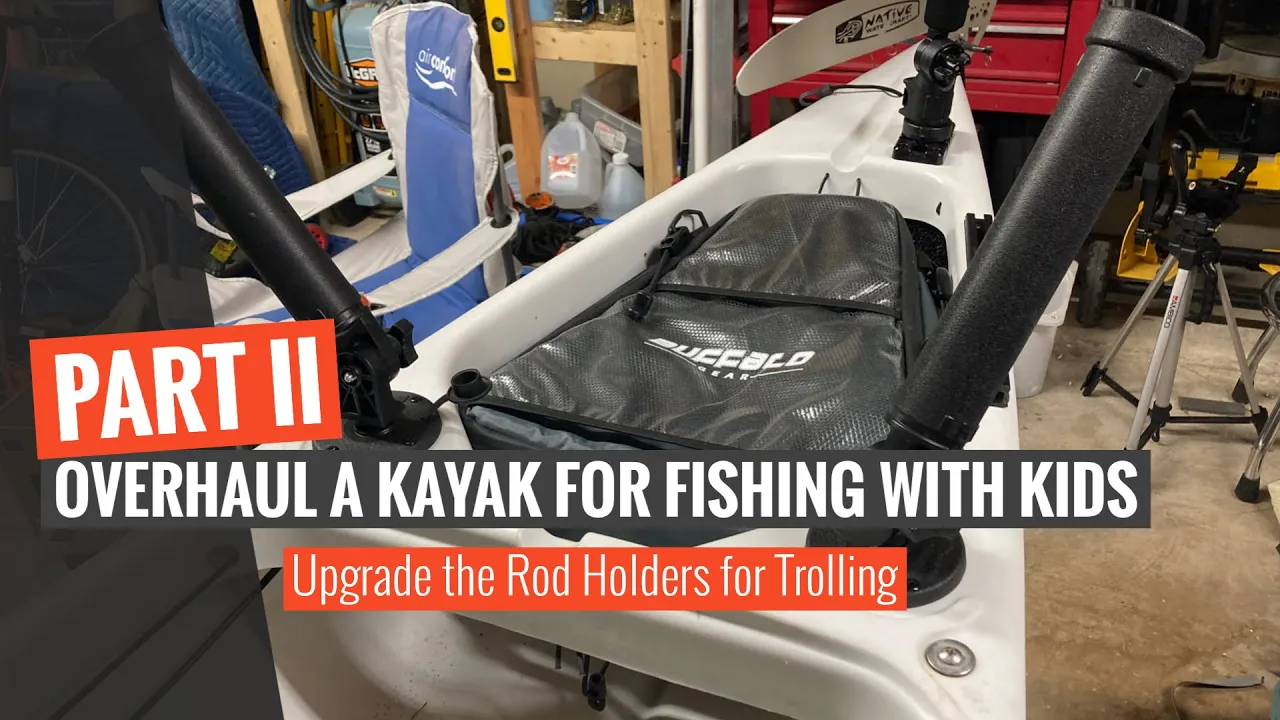
DIY: Overhaul A Kayak, Part 2: Replace and Upgrade Flush Mount Rod Holders
I only recommend products I believe in and use myself. If you purchase something using a link to an item on a post, I may earn a small commission at no additional cost to you. Read More
Warning: Modifying your kayak by drilling or replacing hardware can affect the hull's integrity. This post is to give insight into how I rig my gear, but be sure to consult an expert or the manufacturer prior to attempting on your own.
If you’re following the series, I’m documenting the process of converting a first-generation Native Ultimate into a fishing kayak for myself and my kids. Part two focuses on upgrading the factory flush mount rod holders to Scotty Rocket Launchers. This is a great upgrade for kids because they need action when they’re on the water. These rocket launchers allow you to troll while paddling to a new spot, which has saved more than a few trips by keeping the fish biting while we're on the move. [00:30]
Related Posts

DIY: Overhaul A Kayak, Part 1: Repairing Oyster Rash and Removing Rust

DIY: Overhaul A Kayak, Part 2: Replace and Upgrade Flush Mount Rod Holders

DIY: Overhaul A Kayak, Part 3:Add A YakAttack Mighty Mount Switch

DIY: Overhaul A Kayak, Part 4: Replace the Shock Cord to Bring the Elasticity Back

DIY: Overhaul A Kayak, Part 5: Adding A Track System
Step 1: Remove the Factory Flush Mounts
Using a 10mm wrench, remove the backing nuts holding the factory flush mount rod holders in place. Since these kayaks spend a lot of time in salt water, the hardware can often be rusted out. If the nuts won't budge, just use a pair of pliers to break them off so you can pull the old holder out of the deck. [00:43]
Step 2: Fabricate the Backing Plates
To make the new mounts sturdy enough for trolling, you’ll need a backing plate. Use a poly cutting board and cut out the center hole with a 1-3/8″ hole saw. Once the center is out, test fit the Scotty 344 deck mount and draw a line around the perimeter. Use a jigsaw with a PVC blade to cut the perimeter out. It doesn't have to be pretty—it just needs to provide a solid surface on the underside of the hull. [01:16]
Step 3: Pre-Drill the Base
Insert the deck mount into your new backing plate and pre-drill the holes using a 3/16″ bit. To keep everything from shifting while you drill, insert a 3/16″ rivet into each hole as you go. Make sure you are drilling straight down to keep the alignment true. [01:54]
Step 4: Mount to the Kayak
Place the deck mount into the existing hole on the kayak. The hole pattern will usually match up on the outboard side, but you’ll likely need to drill new holes on the inboard side. Place two rivets in the outboard holes to hold the position, then drill through the inboard side with your 3/16″ bit. [02:15]
Step 5: Secure with Rivets
Slide the backing plate onto the underside and insert your rivets. As you use the rivet gun, push up on the backing plate to ensure a tight, flush fit against the hull. This method is incredibly sturdy thanks to the wide base of the mount and the reinforcement of the cutting board. If a rivet mandrel breaks off unevenly, just cut it off and file it down flush. [02:35]
Wrapping Up
These rocket launchers are a massive improvement over flush mounts. They allow for multiple angle adjustments and can be locked into place by pushing down or left to spin freely, making them perfect for keeping the lines out while you're paddling. [03:02]
Materials Needed
(May Contain Links that Earn Commission)
•
Poly Cutting Board (for backing plates)