DIY: Build A Boomless Sprayer To Plant A No-Till Food Plot
I only recommend products I believe in and use myself. If you purchase something using a link to an item on a post, I may earn a small commission at no additional cost to you. Read More
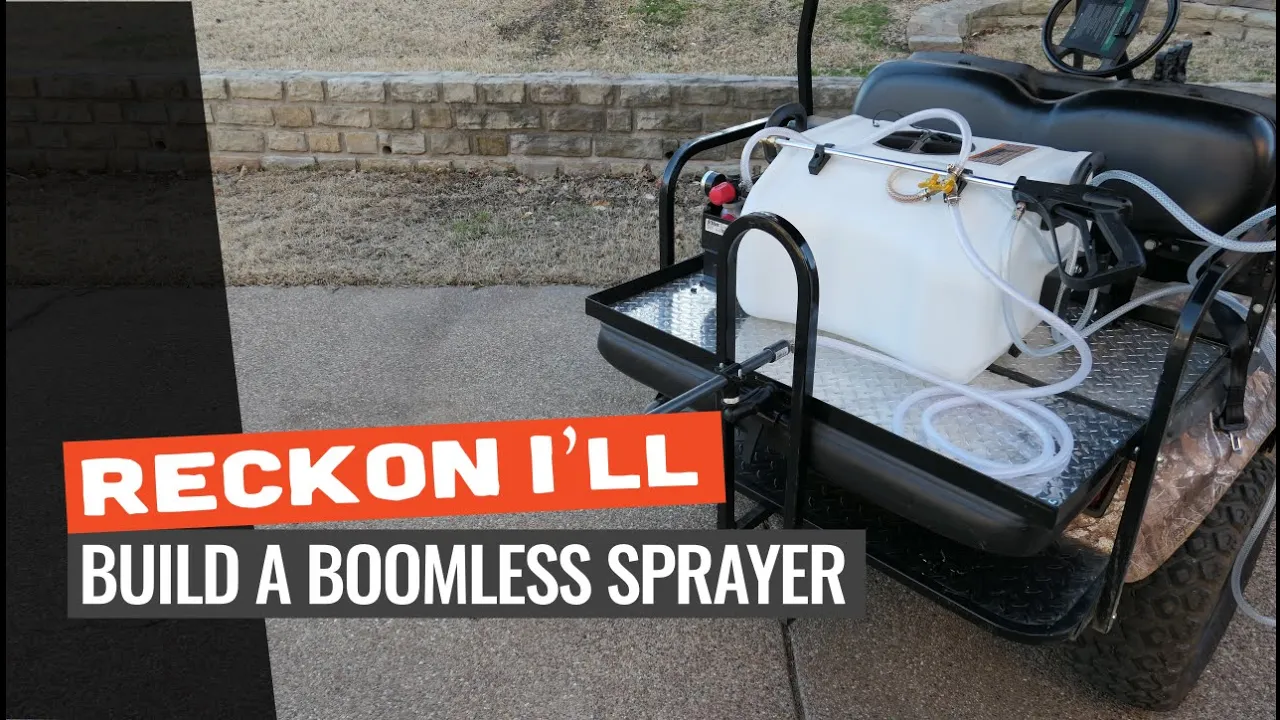
Not everyone has the luxury of a crimper for terminating a food plot. Using a strategic approach to planting than killing and mowing a plot, you can get pretty good results. To make the job easier, I built a boomless sprayer I can throw on my golf cart and save time (and my back and legs) as an alternative to a backpack sprayer.


Part I: Building the Boomless Sprayer Attachment
Step 1: Attach Couplings to Riser
The basis for the boomless sprayer is an 18″ PVC riser. Using teflon tape, attach a coupling to each end of the riser. [00:18]

Step 2: Attach Hose Barb to Riser
To attach the riser to the pump, install a 3/8″ x 1/2″ hose barb on one end of the riser. Be sure to use teflon tape to make a water tight connection. [00:50]

Step 3: Attach 1/4″ Adapter Bushing to Riser
The boomless spray nozzle is threaded 1/4″ MIP. To allow it to connect to the riser, install a 1/2″ x 1/4″FIP bushing in the other coupling on the riser using teflon tape. [01:25]

Step 4: Install Boomless Nozzle
Remove the factor plastic coupling from the boomless nozzle and install it into the coupling with teflon tape. [01:55]

Step 5: Attach Screw Ball to PVC Plug
Drill a 1/4″ hole in the center of a 1/2″ threaded PVC plug and insert a 1″ screw. Screw a YakAttack Screwball onto the flat side of the PVC plug. [02:33]

Step 6: Install Saddle Tee on Riser
To allow the boomless sprayer to be mounted to an ATV, golf cart, or truck, attach a saddle tee on the first third of the riser (closest to the barb). [03:04]

Step 7: Attach Screw Ball to Saddle Tee
Tightly thread the threaded end of the PVC plug into the female threads of the saddle tee. The boomless sprayer is now capable of being mounted and adjusted via a RAM mount. [03:13]

Materials Needed
(May Contain Links that Earn Commission)
•
1/2-in FNPT PVC Coupling (2) (Part 1)•
3/8 in. Barb x 1/2 in. MIP Brass Adapter Fitting (Part 1)•
1/2 in. MIP x 1/4 in. FIP Brass Bushing Fitting (Part 1)•
1/2″ x 18″ PVC Riser (Part 1)•
1/2″ Threaded PVC Plug (Part 1)•
1/2-in MNPT x 3/4-in MNPT Saddle Tee (Part 1)•
1/4-20 x 1″ Hex Bolt (Part 1)•
3/8-in ID x 10-ft Reinforced PVC Clear Reinforced Braided Vinyl Tubing (Part 2)•
3/8-in to 5/8-in dia Stainless Steel Adjustable Clamp (Part 2)Part II: Plumbing the Sprayer for Dual Wand and Boomless Spray
Step 1: Attach Hose to Motor
Cut a 24″ length of PVC tubing. Attach the tubing to the outlet of the pump using a 3/8″ adjustable clip. If it's a little snug, lubricate the valve with some grease/vaseline. [03:45]

Step 2: Attach Hose to 3-Way Valve
Attach the other end of the PVC tubing to the inlet valve of the 3-Way valve. [03:59]

Step 3: Attach Wand to 3-Way Valve
The sprayer comes with a wand. Using the supplied tubing, attach it to one of the outlet valves of the 3-Way valve. [04:44]

Step 4: Attach Hose to Boomless Sprayer
With the remaining PVC tubing, attach it to the barb on the 18″ riser. [04:55]

Step 5: Attach 3-Way Valve to Tank
Attach the other end of the hose to the last opening of the 3-Way valve. This allows you to toggle between the wand and the boomless nozzle. [05:13]

Step 6: Attach Boomless Sprayer To Car/Truck
To attach the boomless sprayer to your ATV, golf cart, or truck, you will need another Screw Ball and a YakAttack ball connector. I added a hole to my golf cart bed to add a Screwball and simply attach and adjust the boomless sprayer to my desired angle. [05:43]

Conclusion
This system allows for a roughly 12-foot spray pattern, making it much faster to treat fields than using a backpack sprayer. By being able to switch between the wand for spot treatments and the boomless nozzle for large areas, you have a versatile tool for managing any size food plot. [06:08]