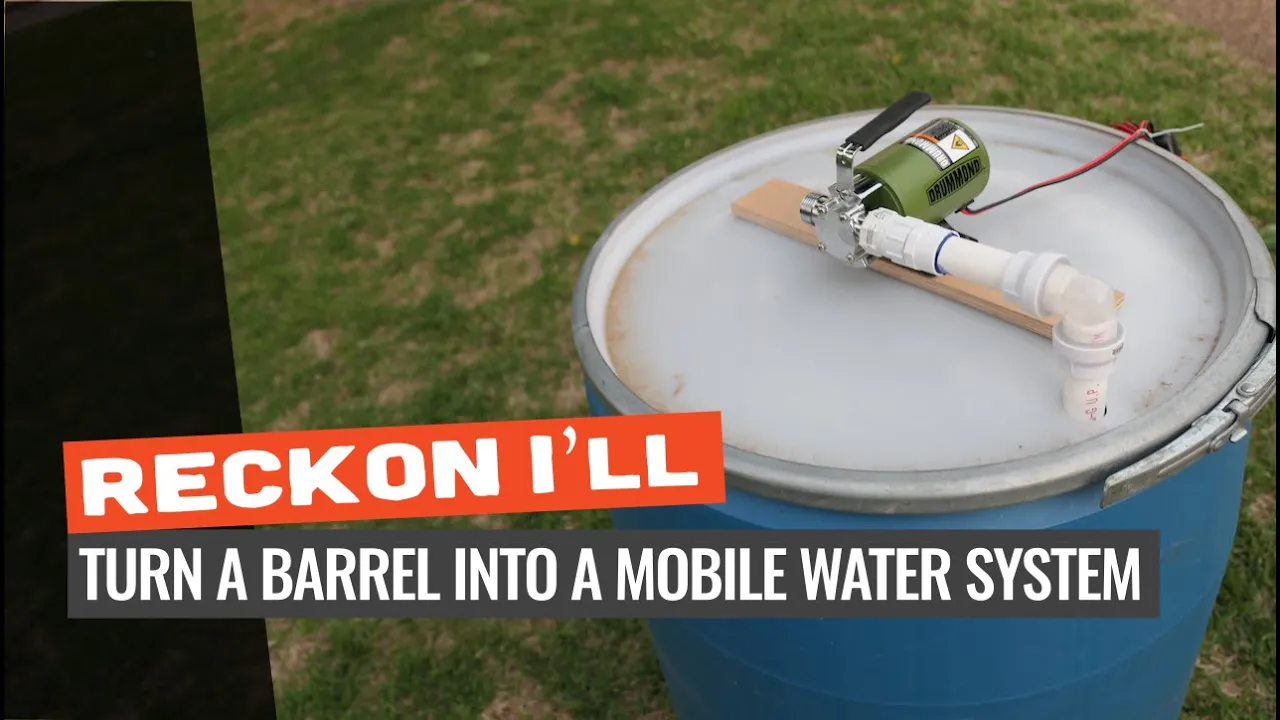
DIY: Turn A 50 Gallon Barrel Into A Mobile Water System for Food Plotting
I only recommend products I believe in and use myself. If you purchase something using a link to an item on a post, I may earn a small commission at no additional cost to you. Read More
Food plotting on a remote property offers quite a few challenges. One challenge I’ve had is moving water around for various projects on remote locations of the property e.g. mixing herbicide, managing hot spots when burning off duff in a field, or mixing concrete.
Piggy-backing on my solution for bringing in water (see Designing an Off-grid Water System), I’ve outlined how to use a transfer pump and a blue barrel to haul a water system around the property.


Step 1: Mark and Drill Holes for the Pump
Using the pump as a template, mark each hole that will anchor the pump to the lid of the barrel. In my case, a 1/4″ bit was the size needed for anchoring the pump. Thread the stainless screws from the bottom of the lid and secure with a nyloc nut. [00:23]

Step 2: Attach the 3/4″ Threaded PVC Adapter
The other end of the Drip Irrigation Female Adapter is threaded to receive 3/4 threaded PVC. Wrap the threads in teflon tape, and secure. [01:06]

Step 3: Attach the Drip Irrigation Female Adapter
On the intake-side of the pump, attach the Drip Irrigation Female adapter to the pump. The garden hose threaded end will have a rubber washer so no need for teflon tape. [01:03]

Step 4: Cut A 1″ Hole in the Lid
To draw water from the barrel, drill a 1″ hole towards the outer rim of the barrel lid. A spade bit will work, but a step bit will make a cleaner hole. [01:13]

Step 5: Cut a 35″ Length of 3/4″ Pipe
If using a 1/2″ piece of plywood for your “plate”, you’ll need about a 35″ pipe to reach the bottom of the barrel. Attach the 90 degree push fitting to one end of the PVC. [01:21]

Cut the other end of the PVC at a 45 degree angle to prevent it from suctioning to the bottom of the barrel. [01:25]

Step 6: Drill the Anchoring “Plate”
Since I wanted to leave the stainless hardware in the lid to easily add/remove the pump when necessary, I needed to add a “plate” to allow the pump to sit level (without teetering back and forth on the bolts). The plate also serves to spread the stress of the pump across a greater service area. To build the plate, mark the location of the holes on a pieces of wood or starboard (think cutting board) and drill 1″ holes that will easily slide over the nyloc nuts. [01:39]

The 1″ bolt should give enough clearance to still anchor the pump with a pair of butterfly nuts. I went with stainless to avoid rust. [02:02]
Step 7: Cut the Adjoining Pipe to the Pump
Insert the suction pipe and measure the distance from the interior seat of the slip-end of the PVC adapter to the interior seat of the 90 degree elbow. Cut the length of 3/4″ PVC needed. [02:18]

Step 8: Insert and Glue Adjoining Pipe
Insert the 90 degree elbow. Glue the slip end attached to the pump. [02:30]

Step 9: Connect to a 12V Battery
At this point, everything is in place…simply connect to 12volts and your pump is ready to go. [03:11]

Step 10: Attach the Quick Connect to the Pump (optional)
I prefer to use a quick connect so I can move quickly and not run the risk of loosening any of the teflon connections (and not having a wrench handy to tighten them). [02:58]

Materials Needed
(May Contain Links that Earn Commission)
•
3/4″ PVC•
3/4-in Push Fitting x 3/4-in Threaded Adapter•
3/4-in x 3/4-in 90-Degree Elbow PVC Elbow•
3/4-in Threaded Drip Irrigation Female Adapter•
Teflon Tape•
1″ Panhead 1/4″ 20 Stainless Screws (2)•
1/4-20 Stainless Nyloc Nuts (2)•
1/4-20 Stainless Butterfly Nuts (2)•
14″ x 3″ Piece of 1/2″ Plywood or StarboardConclusion
So far this system has been a lifesaver as winter has turned to spring. Having water at the ready not only makes for easier food plotting, but it also opens up a few more opportunities for prescribed fire.
