DIY: Climbing Stick Aider
I only recommend products I believe in and use myself. If you purchase something using a link to an item on a post, I may earn a small commission at no additional cost to you. Read More
One of the bigger challenges when packing a stand in to hunt public land is keeping gear weight down. In recent years, hunters have been augmenting climbing sticks with “aiders”—lightweight climbing devices that allow you to climb higher without adding extra sticks.
This tutorial describes how to tie an aider using tubular webbing. One end of the aider slips over your boot, while the other end is looped over the top step of your climbing stick. By driving your toe in and leaning into your lineman’s belt, you can pull yourself up with ease.


Step 1: Tying the Aider
The tubular webbing serves as the foundation. The length required depends on your height and the distance you want between sticks.
First Loop: Using a water knot, tie a large loop (roughly 12 inches) in one end of the webbing. Leave plenty of tag end to ensure the knot doesn’t slip over time. [00:00:14]
Second Loop: Repeat the process on the other end, tying an identical loop.
Step 2: Tying the Safety Line
Since the aider is attached to your foot rather than the stick, a safety line ensures you don't drop it while climbing. [00:00:36]
Form a Bight: Tie a figure-eight knot in one end of the paracord and attach the carabiner.
Fixed Loop: Tie a fixed loop (like a Honda knot) in the other end, just large enough for the carabiner to slip through.
Silence the Gear: Cover the carabiner with veterinarian tape to cut down on metallic noise if it bumps your climbing stick.
Step 3: Attaching the Aider to Your Boot
Step on the loop of one side of the aider.
Thread the tag end through the loop to create a slip knot around your foot and pull it tight. [00:00:18]
Wrap the safety line around your ankle, pull the carabiner through the paracord bight, and clip it to the aider loop. [00:00:40]
Tip: When not in use, you can stuff the aider into your boot to keep it out of the way until you reach the tree.
Step 4: How to Climb Safely
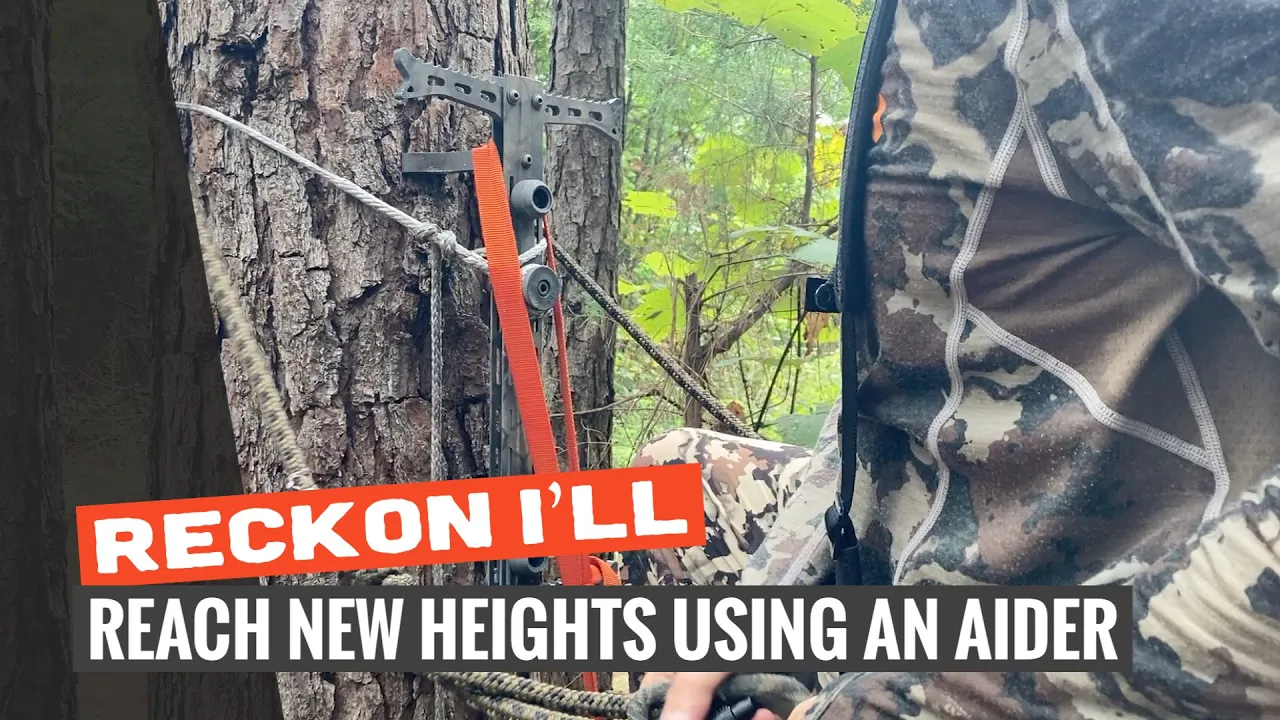
The Hook-Up: With the aider on your foot and the stick attached to the tree, place the top loop of the aider over the top of the climbing stick. [00:00:45]
Lineman’s Belt: Extend your lineman’s belt all the way out. Proper length is key—it provides the leverage needed to sit back and pull yourself up. [00:00:54]
Toe Drive: As you step up, drive your toe firmly into the tree. This prevents your foot from shaking and provides a steady, firm step. [00:01:20]
Descending: Use the same "toe drive" technique when coming down to ensure a nice, steady step onto the aider. [00:01:37]
Conclusion
Aiders are most effective and safest when used on the steps closest to the ground. This setup allows you to reach much higher elevations without the bulk and weight of carrying extra climbing sticks. [00:01:50]
Materials Needed
(May Contain Links that Earn Commission)