DIY: Build My Own Arrows
I only recommend products I believe in and use myself. If you purchase something using a link to an item on a post, I may earn a small commission at no additional cost to you. Read More
Warning: Carbon fiber dust is hazardous to inhale. Always wear a respirator when cutting or grinding carbon shafts, especially if working in an enclosed space. This post outlines a personal arrow-building process; if you are new to archery gear, consult a professional to ensure your arrows are safe to shoot.
Building your own arrows is a great way to save money and ensure your gear is exactly how you want it. While not for competitive shooting, this process has worked perfectly in the field for years. Most of the tools used, like the arrow saw and squaring tool, were found easily on Craigslist or Amazon. Here is the step-by-step on how to cut and assemble hunting arrows.
Related Posts

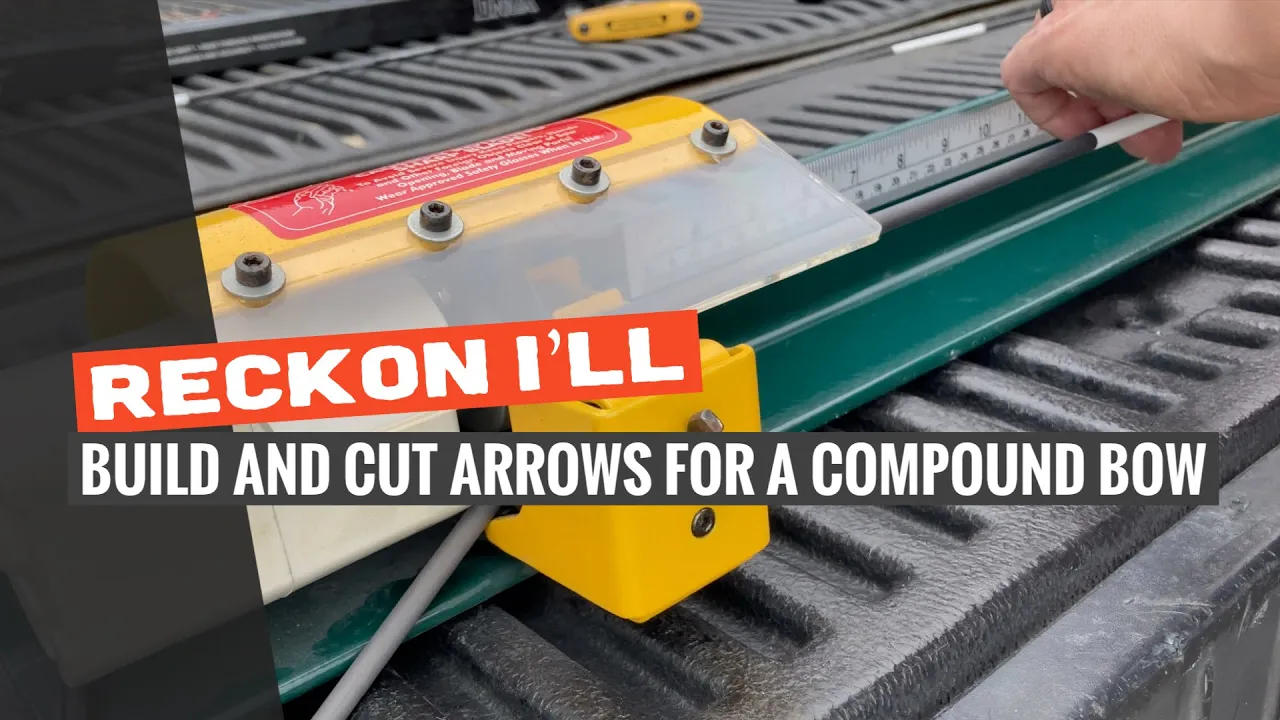
Step 1: Set the Saw Depth and Length
The goal with the arrow saw is to cut through only one wall of the shaft at a time. If you chop straight through, the blade can drift, resulting in an uneven cut. Adjust the saw guard so only the top of the blade is exposed to the arrow wall. [00:00:46]
To set the length, use an existing favorite arrow as a template. Place the template arrow into the saw's stop and adjust it until the blade aligns exactly where the shaft meets the insert. [00:01:47]
Step 2: Cut the Shafts
With the length and depth set, place your new shaft (either bare or pre-fletched) against the stop. Slowly rotate the arrow toward the blade, spinning the shaft as you go. Take one extra full revolution once the cut is complete to help clean up any burrs. [00:02:24]
Step 3: Square the Shaft
Even with a good saw, the cut might not be perfectly square. This is where the G5 Squaring Tool comes in. [00:02:39]
Use a silver Sharpie to color the freshly cut edge of the arrow shaft.
Place the shaft in the squaring tool and rotate it against the abrasive surface.
Keep grinding until the silver Sharpie mark is completely gone. This indicates that the entire circumference is flush and square, allowing your insert to sit perfectly. [00:03:07]
Step 4: Clean the Interior
Carbon dust from the cut and the grinding will prevent glue from bonding. Soak a cotton swab in isopropyl alcohol (peel some cotton off if the fit is too tight) and run it through the inside of the shaft. Follow up with a dry swab. Continue until the swabs come out clean. [00:03:22]
Step 5: Install Inserts with Hot Glue
Pull the nock out of the back of the arrow before gluing. This prevents air pressure from building up inside the shaft (the "piston effect"), which can push the insert back out before the glue sets. [00:04:02] Use a low-temp hot glue gun to apply glue directly to the insert. Quickly push the insert into the shaft and immediately swirl it in a cup of water to set the glue. [00:04:22] The low-temp glue allows you to easily remove the insert later with a little heat if you ever need to replace it.
Step 6: Spin Test
Once the glue has cured, install your broadhead and perform a spin test. Rotate the arrow and watch the tip—ideally, it should stay on one fixed point rather than wobbling in a circle. [00:05:11] If it spins true, your arrow is ready for the range.
Wrapping Up
Building your own arrows is a rewarding part of the archery experience. It gives you a better understanding of your gear and helps keep your setup consistent. Take your time with the squaring and cleaning—those are the steps that really make the difference in how the arrow flies. Hope it helps y'all!
Materials Needed
(May Contain Links that Earn Commission)
•
Isopropyl Alcohol and Cotton Swabs•
Low-Temp Hot Glue Gun and Glue•
Arrow Shafts, Inserts, and Nocks