DIY: Weld Kayak Carrier J-Hooks on a Golf Cart/ATV/Hunting Buggy Utility Trailer
I only recommend products I believe in and use myself. If you purchase something using a link to an item on a post, I may earn a small commission at no additional cost to you. Read More
Warning: This project involves welding and fabricating custom brackets for towing. Improper welds can fail under the stress of highway speeds. If you are not an experienced welder, consult a professional to ensure your rack is structurally sound.
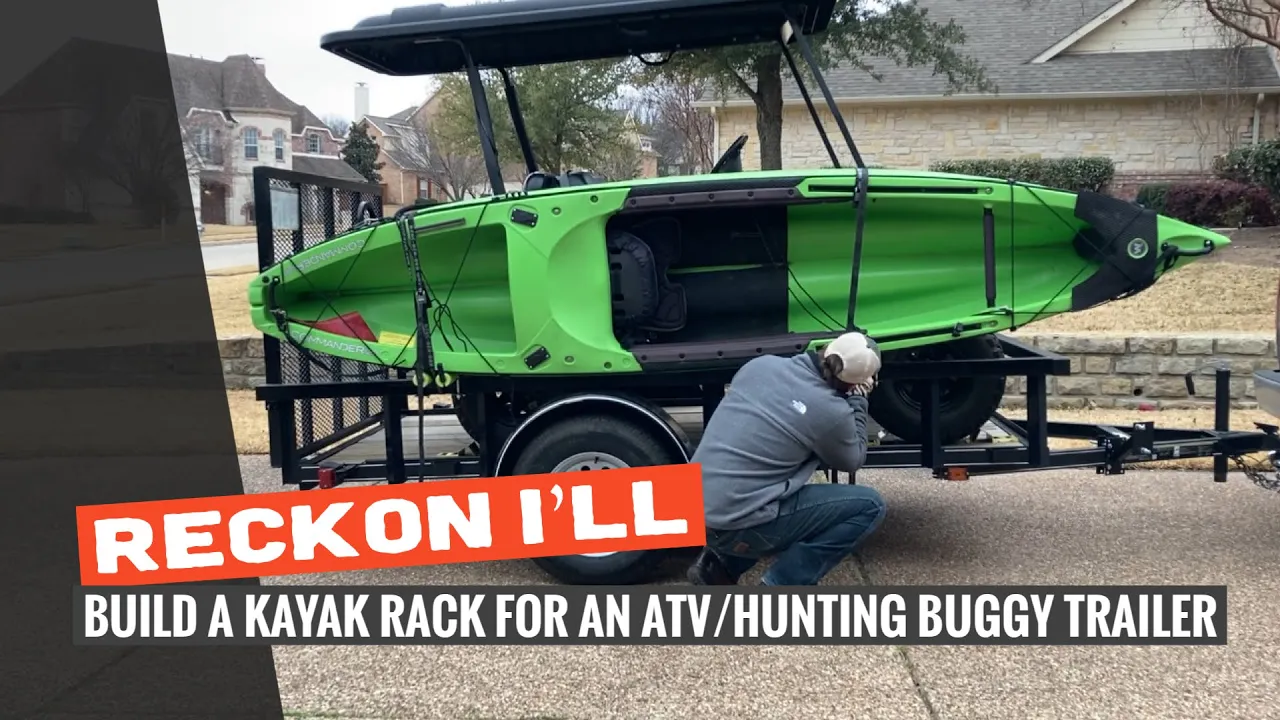
When I’m heading out on a trip with the golf cart, I need a way to carry my kayaks without loading them on top of the truck. I built a set of custom J-hooks that attach directly to the rail of my utility trailer. This setup keeps the kayaks secure, doesn't make the trailer any wider, and allows me to move the hooks to accommodate different kayak lengths.


Step 1: Cut and Miter the Square Tube
For each J-hook, you’ll need two "L" sections. Cut the vertical pieces to 2 feet and the horizontal pieces to 1 foot 3/4 inches. Miter one end of each at 45 degrees. To create the "J" shape, cut a 3-inch section and miter the connection points at 60 degrees. [01:40]
Step 2: Weld the Main Frame
Weld your 45-degree mitered pieces together to form two identical "L" frames. To join them into a double-railed hook, use a 3-inch spacer at the corner and the top. This creates a gap in the center of the hook to run your tie-down straps through later. Weld the 60-degree mitered 3-inch piece to the end of the frame to finish the hook shape. [02:30]
Step 3: Fabricate the Mounting Brackets
Cut two 7.5-inch pieces of 1.5-inch angle iron per hook. Drill two 3/8-inch holes in each, 3/4-inch from the sides and 4.5 inches from the back. [03:26] Weld one piece of angle iron to the 2-foot vertical section of your hook. The second piece acts as the bottom sandwich plate. For the flat bar brackets, drill 3/8-inch holes 3/4-inch from the ends and 1 inch from the sides. [04:13]
Step 4: Prep and Paint
Grind down all welds to ensure there are no sharp burrs. Use an angle grinder to round off the corners of the angle iron and flat bar [04:22]. Spray the assembly with black truck bed liner for a tough finish [04:33]. Once dry, tap in your 3/4-inch square tube plugs [04:46].
Step 5: Add the Padding
Cut pool noodles to fit the steel. For the long vertical sections, slice the noodle down the side, wrap it around the tube, and use a heat gun to melt the edges back together for a permanent seal. [05:03] For the shorter sections, you can simply slide them on; the weight of the kayak will hold them in place. [05:18]
Step 6: Mount to the Trailer
Slide the hooks onto your trailer rail and space them to match your kayak. Secure the bottom brackets using 3.5-inch hex bolts, tightening them until at least three threads show past the nut. [01:12] Since you can't use bow and stern lines on a trailer, run extra straps from the kayak to the front and back of the trailer frame for safety. [00:50]
Wrapping Up
This rack makes it easy to haul two kayaks alongside a golf cart or ATV. It's a solid, removable system that keeps the gear secure and the truck bed free. Hope it helps y'all!
Materials Needed
(May Contain Links that Earn Commission)
•
1" Square Steel Tube (1/8" wall thickness)•
1.5" Angle Iron•
2" Flat Bar•
3.5" Hex Bolts (3/8" diameter)•
3/8" Nuts and Washers•
Pool Noodles•
3/4" Square Tube Plugs•
Black Truck Bed Liner Spray